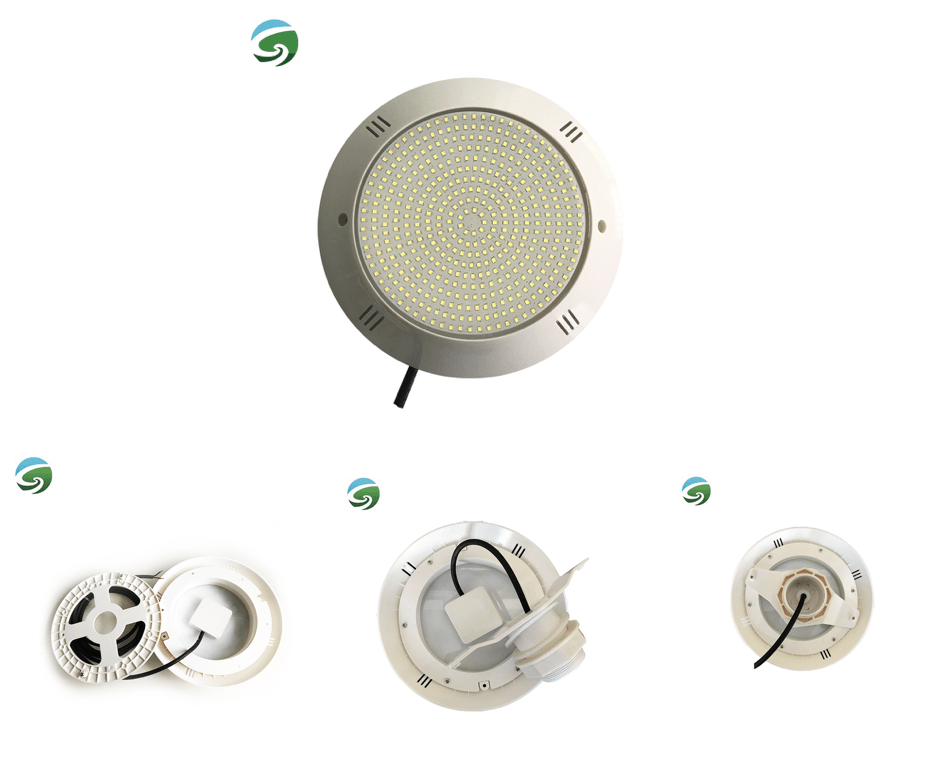
Manual of Wall Mounted and Fibleglass LED Pool Light
Model No: Niche with LED PAR56 Bulb
IMPORTANT:
This manual includes essential information on the safety measures to be
implemented for installation and start-up. Therefore, the installer, as well as the user, must
read these instructions before beginning installation and start-up.
• Only qualified electrical personnel should install the lighting for added safety.
• Disconnect the electrical power during the installation of the lighting.
• Do not handle the lighting during installation with wet hands or feet.
Technical Specification:
Standard input voltage: 12V AC
Voltaje de Entrada: 12VAC
Standard input watt: 35w
Consumo:35W
Color Changing with Synchronisation capability
Cambio de color con capacidad de sincronización
Instruction & Use
INSTRUCCIONES
CAUTION:
- The pool must be completely dry, to avoid any type of accident to the personnel during its installation when using tools (electric drill, electric screwdriver, electric cable, etc.). at 127-245V AC. If you use 12VAC cordless or battery powered tools it will not be necessary to completely drain the pool water level during installation, just take precautionary measures.
- 1.- De-energize all electrical current in the area where the lighting will be installed for greater precaution.
- 2.- Empty the pool or lower the water level to the area where the lighting will be installed.
- 3.- Locate the position of the lighting fixture to be fixed (45cm below the water level), Insert the fixture cable over the ductwork and channel it to the electrical connection register, leaving the cable a little loose for the fixture installation, make the holes to place the base of the lighting fixture and finally adjust it so that it remains fixed on the wall of the pool.
- Before installing the lighting, you must already have the ductwork for wiring the lighting to the register and later to the main power supply.
This is a high technology electronic controlled light based on LED’s in three or four colors: red, green, blue and white. These three or four base colors together can produce many other colors to create the perfect atmosphere in the pool. Any of the 14 pre-programmed effects can be selected with the switch on/off of your pool lights. The LED’s can also be warm white only blue color only or cool white only. The LED’s are driven by constant current. The technology of True PWM is adopted on the lights. High temperature protection makes the LED’s be protected while the internal temperature reaches a high level. All these technologies guarantee long working life of the LED lamps. Filled fully with resin, the lights are completely waterproof, and they must be used / operated while fully submerged underwater only
• This lamp is designed to be fixed in new pools or pools with existing mounted niches that need replacement.
• This lamp is designed to be used only once. Should it become defective, repair is impossible, and replacement is necessary.
- The manufacturer is not responsible in any circumstances for assembly, installation or start-up of any electric components which have been inserted or handled at locations other than its own premises
Changing the color of led lights with Synchronisation:
1. Please make sure the light input voltage is AC12V
2. Connected the all lights together with one transformer
3. Switch on the light keep it working over 5 seconds but less than 15 second and than switch off/on again.
Change and keep the color one by one:
- Switch on the lights, keep it working less than 5 seconds, and than switch off/on again to run the color one by one.
Cambia y conserva el color uno a uno:
Encienda las luces, déjelas funcionando menos de 5 segundos y luego apague / encienda nuevamente para ejecutar el color uno por uno.
Keep the lights with memory:
1.Switch on the lights, keep the color which we need, let the lights working over 15 seconds,
The pre-program will remember it, after we switch off the light today, and switch one again tomorrow, it will be keep same color of the lights.
Mantenga las luces con memoria:
1.Encienda las luces, mantenga el color que necesitamos, deje que las luces funcionen durante 15 segundos,
El preprograma lo recordará, después de que apaguemos la luz hoy y volvamos a encender una mañana, se mantendrá el mismo color de las luces.
Installation
All lamps should be placed on the wall of the pool at approximately 700mm below the water surface, in areas that are easily accessible from the upper edge of the pool.
• It is highly recommended to use the underwater cable gland
• All lamps should be installed on the same transformer and switch.
- The lamp is supplied with cable of 3m, 4m, 6m, 10m, 16m or 20m according to the need of the user, making it possible to install multiple lamps connected to a single junction box.
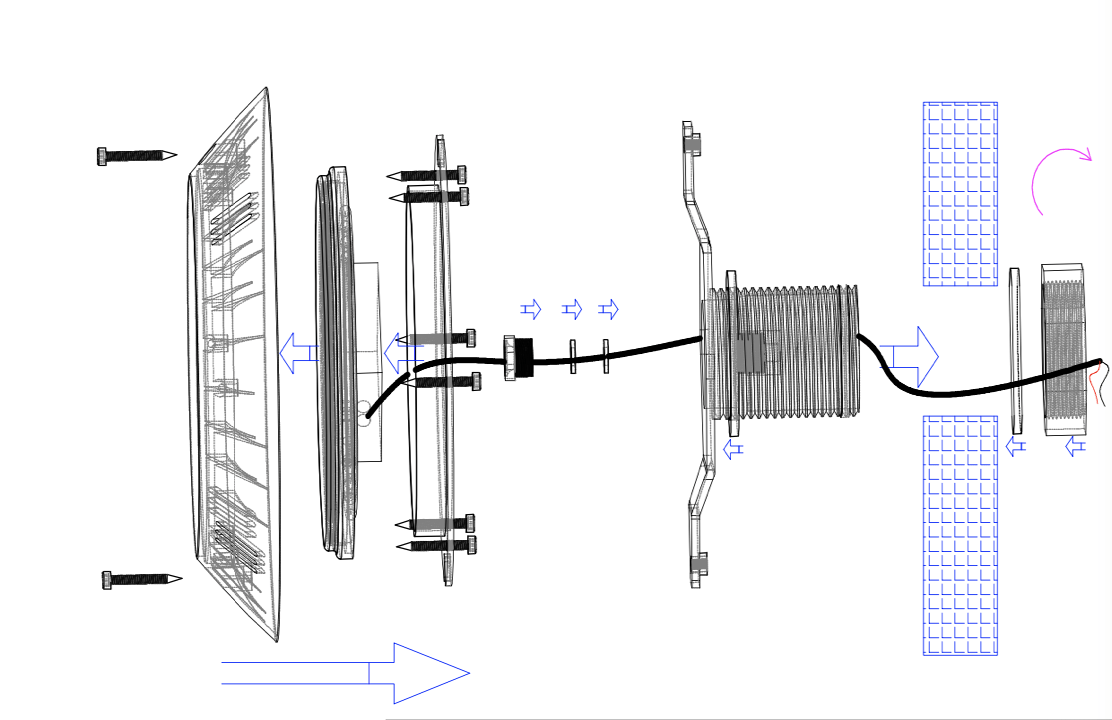
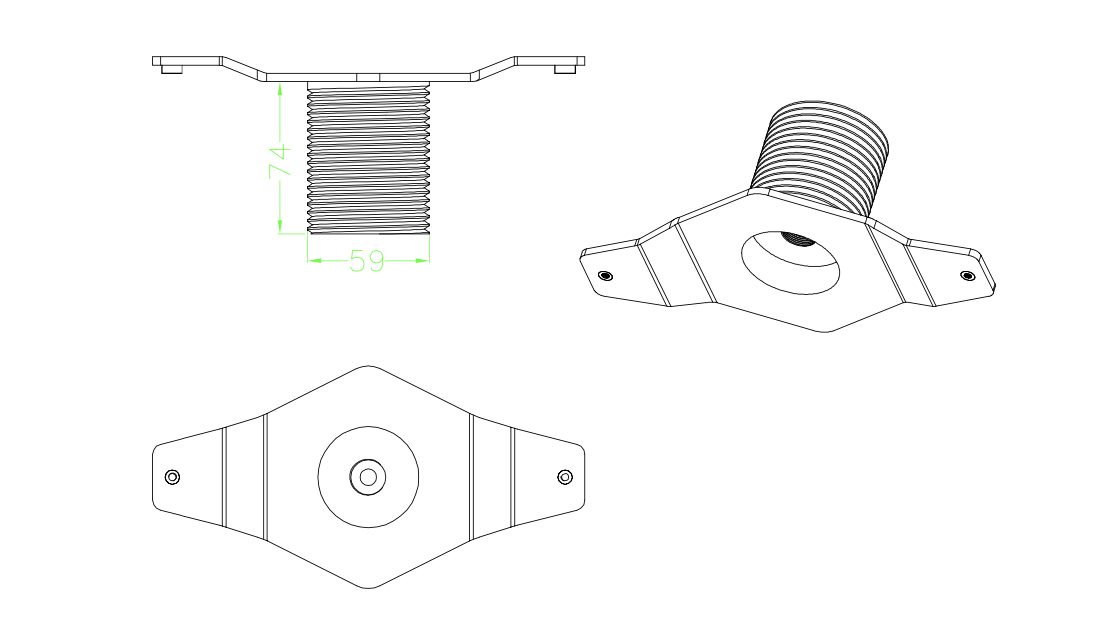
The instruction of installation drawing as following:
The installation one for the concrete swimming pool:
Las instrucciones del dibujo de instalación son las siguientes:
La instalación para la piscina de hormigón:

The installation two for the fiberglass swimming pool:
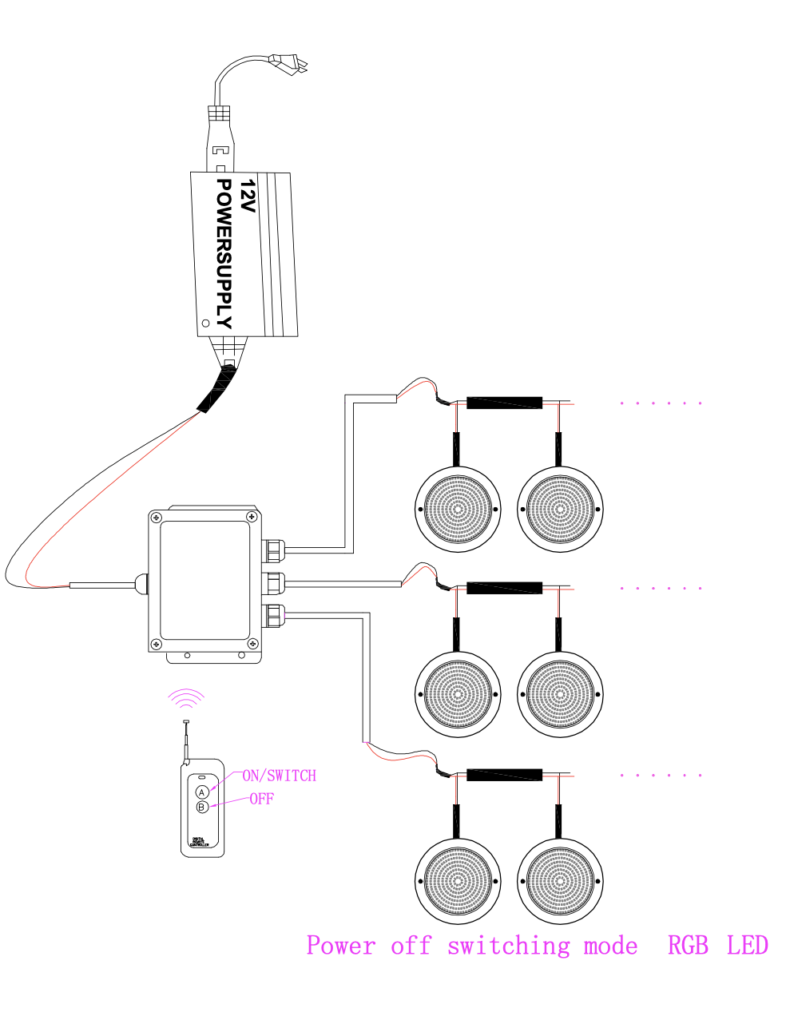
Connect the cable from the lamp to the power source
The below drawing shows how to connect the cable from the lamp to the power source.
Note: Don’t use electronic transformers which may damage the light. You should use industrial frequency transformer, such as toroidal transformer and square transformer
Maintenance & Replacement
There is no maintenance required for this lamp – it is designed to be used only once, meaning that replacement is necessary if it becomes defective (repairing is impossible). Before any handling, ensure that there is NO voltage supplied to the lamp. To replace, unfasten the lamp from the bracket. Ensure the new lamp is of the same model and characteristics as the one being replaced.
If the cable pipes you use has inner diameter 26mm or more, you can use the retrofit connector to connect the cable easily. Simply crimp both connections with the splice connectors, slide the cable sleeve over the connection and hand tighten the gland nuts. Then hide the retrofit connector in the pipe. The retrofit connector is ordered separately
Start-up
The lamp should only operate underwater while secured to the vertical walls of the pool.
Never switch on the lamp if it is not underwater.
• In case of colored lamps, 14 pre-programmed effects and combinations may be selected using the on/off switch of your pool lights. Just switch off and switch on within 3 seconds.
• If the light is powered off for more than 10 seconds, it will keep the latest program when it is turned on again.
To achieve synchronization, confirm all lamps are installed correctly on the same switch, after they are powered off for more than 10 seconds, switch on and switch off continuously three times, and then finally turn them on again. They will all go to program . Now you can select a program for them by switch off and on within 5 seconds.